
 Apr 29, 2020
  8.8k
8.8k

24
JulMonth End Offerl : Get 30% OFF + $999 Study Material FREE - SCHEDULE CALL
- SQL Server Blogs -
In this blog, we will learn about two important aspects of SSRS. We will learn how to create a sub-report in SSRS. We will also learn how to deploy an SSRS report file into the production server and manage it using the report manager tool.
Sub-reports allow us to add one or more related reports to the Data region. The advantages of Sub Reports are as follows.
Once you have developed an SSRS report and tested in the development server, next is the process of deployment in the live server from where the user can view the report. SSRS reports are generally deployed in a web environment so that users can access the report from anywhere.
Over the next few pages, we will be discussing different formats of SSRS sub-reports and also about the report deployment process.
We will show the sub-report design using both Report Designer and report developer. First, we will use a Report designer. We will start with a simple sub-report example. In this context, it may be said that Sub-reports and main reports are two SSRS reports which are clubbed together. These reports can function separately as independent reports. We will also be using the Adventureworks database for all the SSRS examples. The tables that we will be using are SalesOrderHeader and SalesOrderDetails.
Step 1
Open Visual Studio and select new project and select a Report Server Project.
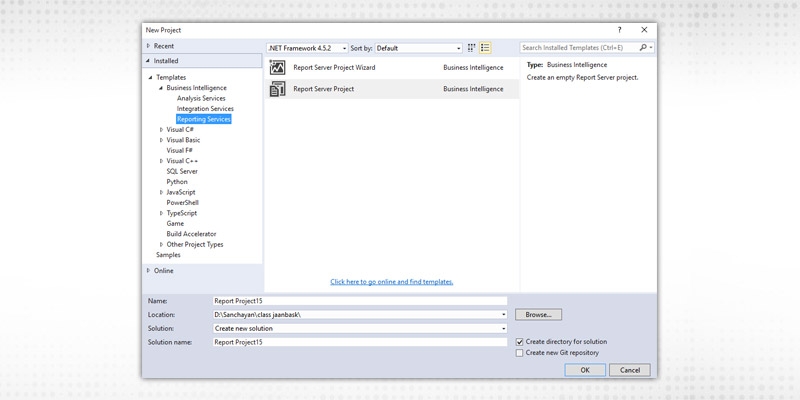
Click ok and a new project will be created.
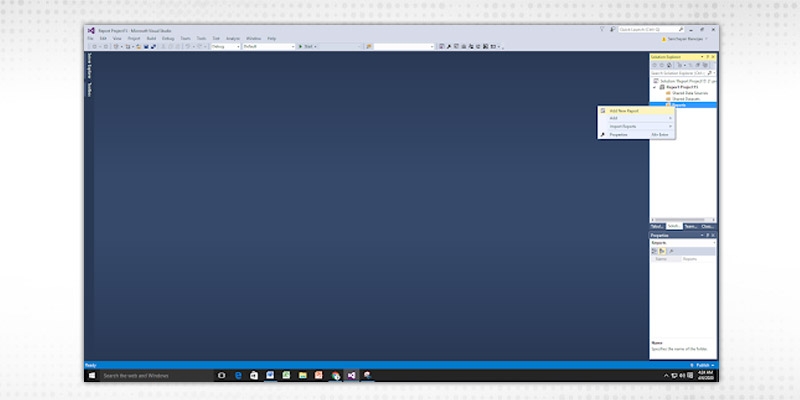
Step 2
Right-click on the Reports tab in the solution explorer and click on Add New Report.
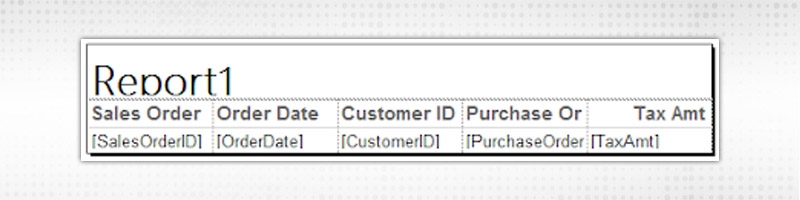
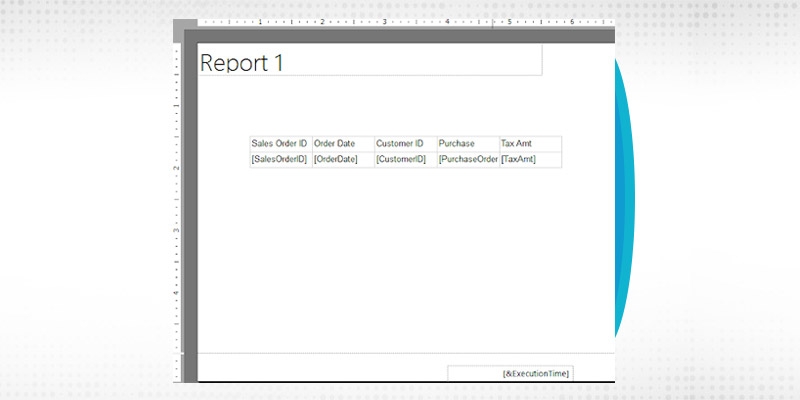
The report wizard screens will Popup. Follow the steps of report creation and create the main report .We will be using the following SQL query for the main report.
select SalesOrderID,OrderDate,CustomerID,PurchaseOrderNumber,TaxAmt from [Sales].[SalesOrderHeader] where SalesOrderID=@salesid
Step 3
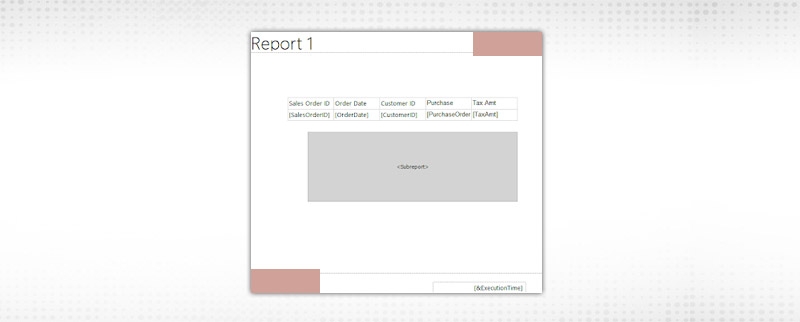
The final report design will look like below
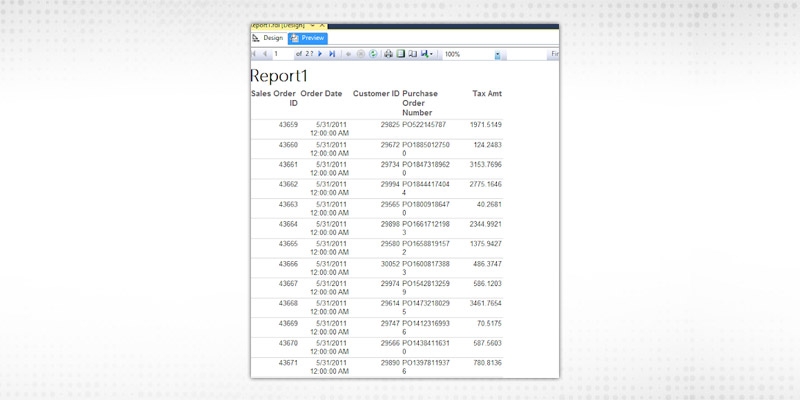
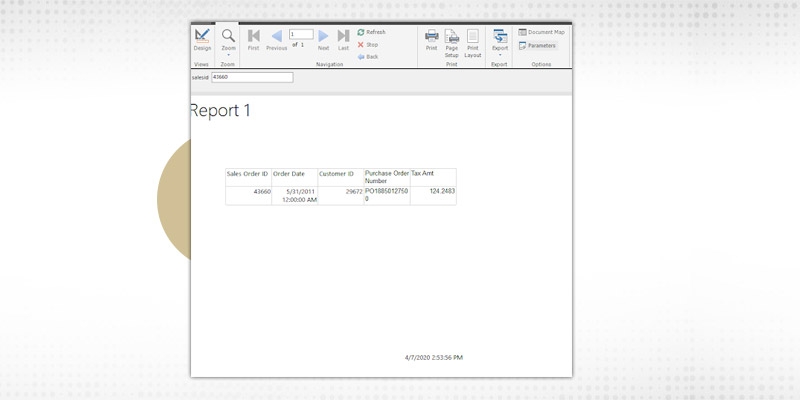
The final output of the report will be as below.
Step 4
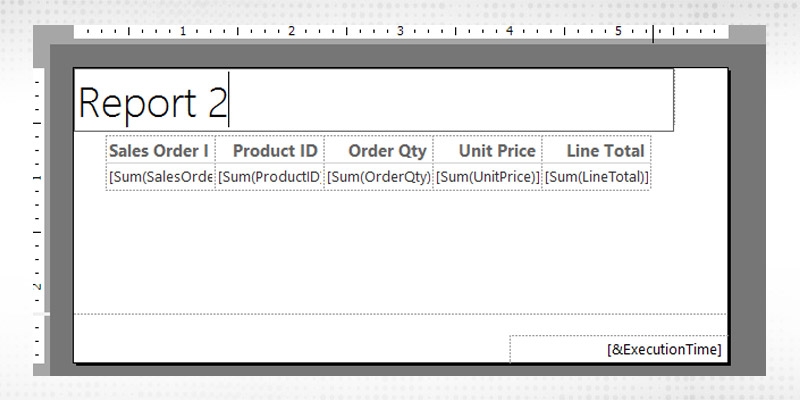
Similarly we will create the report that we will use as a sub-report in the same way. For the sub report we will be using the following SQL query.
select SalesOrderID,ProductID,OrderQty,UnitPrice,LineTotal from [Sales].[SalesOrderDetail] where SalesOrderID=@salesid
The @salesid is a parameter which would receive value from outside. When we create the sub-report this will be the connection between the main report and the sub report.
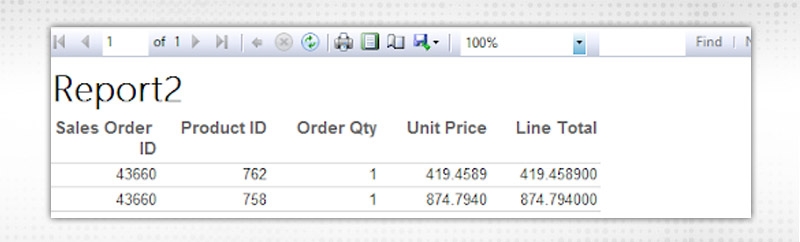
The second report design will look like below.
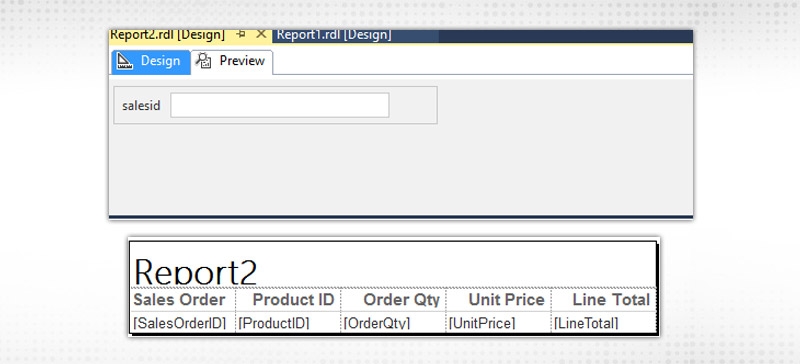
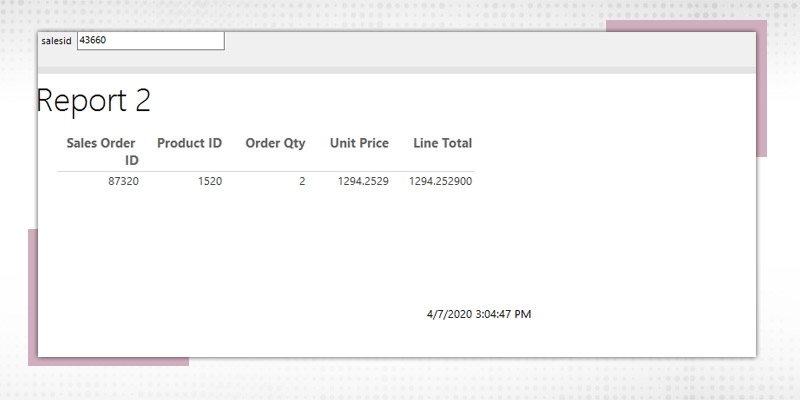
And the output looks like
Step 5
As discussed earlier both the main report and the sub report exists as a separate report in the SSRS report project.

Step 6
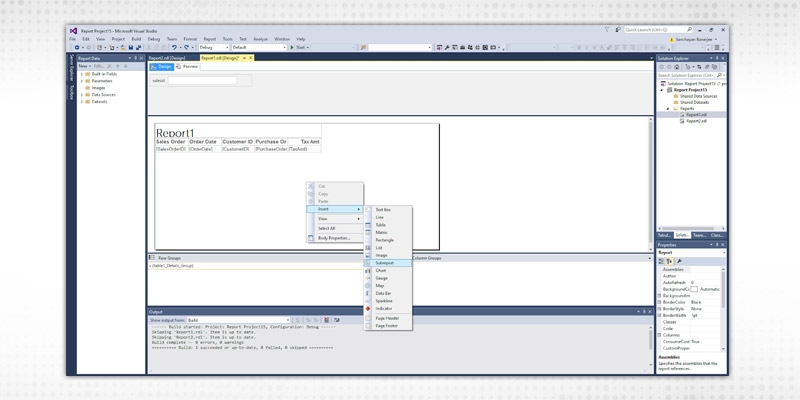
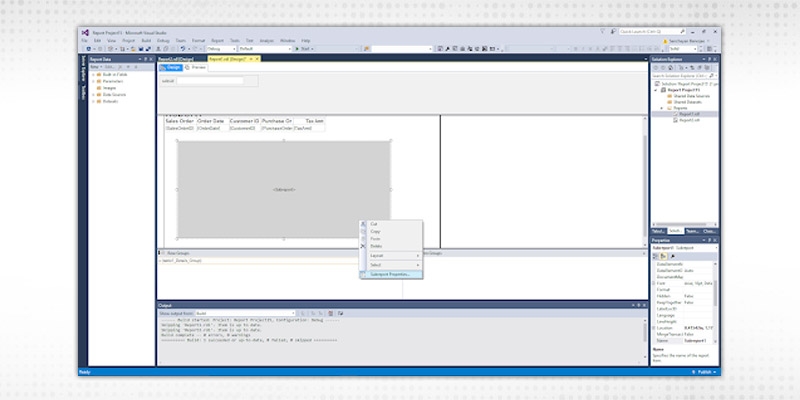
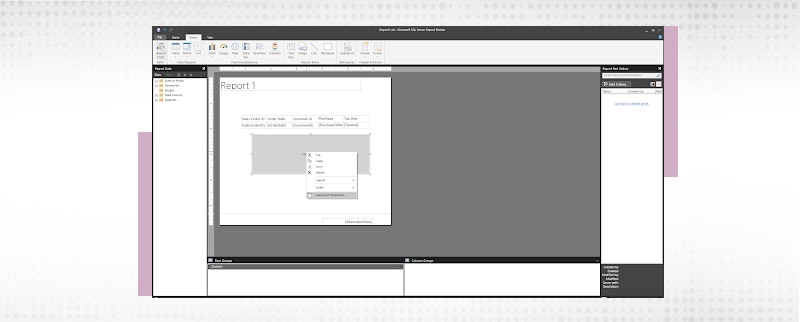
Next we will create the Sub Report. Open report1.Right click and click on insert and select Sub Report.
Step 6
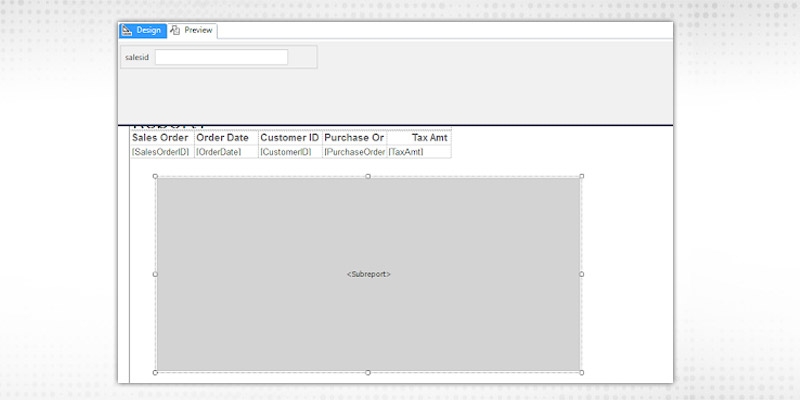
A blank sub report container is inserted into the report.
Step 7
Right click on the Sub report container and select sub report properties.
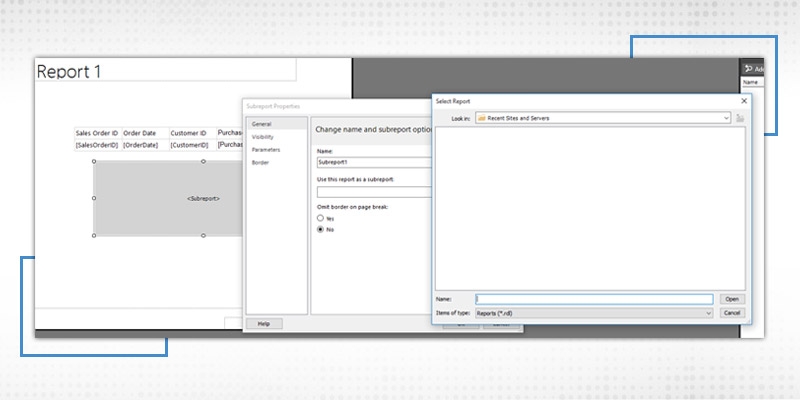
Step 8
The sub report properties window pops up. Set the name of the report to be used as sub report. Here we will choose Report 2.
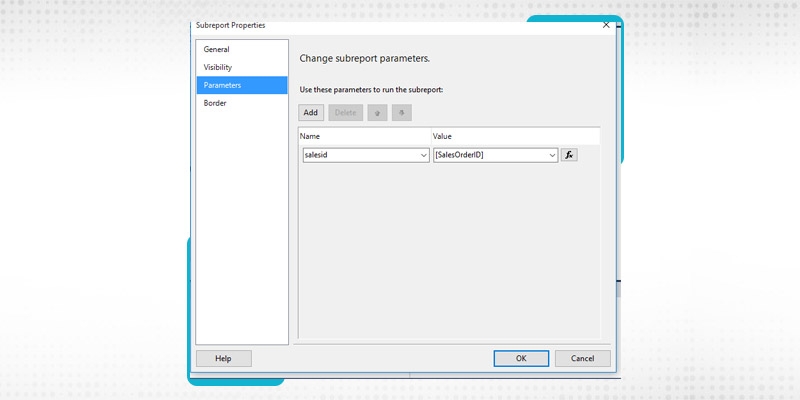
Step 9
Next we will join the parameter of the main and sub report.
Then we click on Ok.
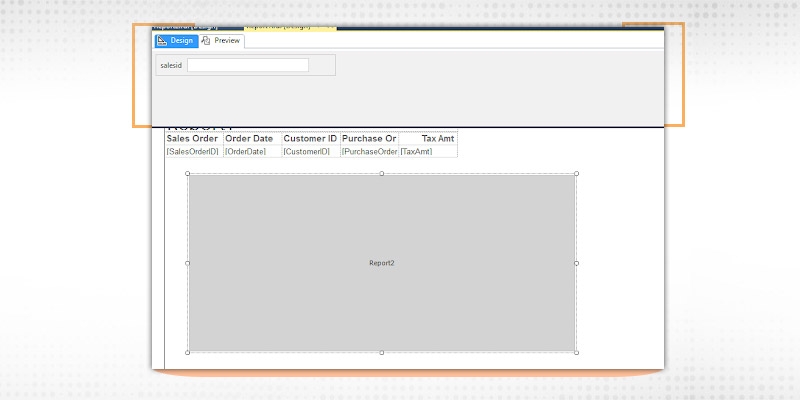
Step 10
The report design window will look like below.
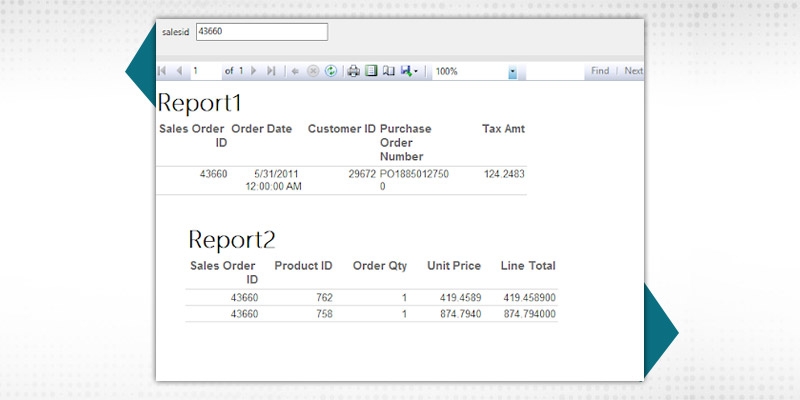
Step 11
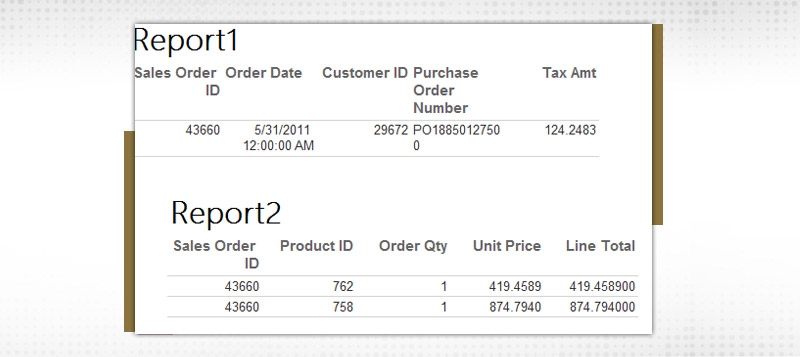
Now if we run the report, the output will look like below.
We will next use the report builder tool to replicate the sub report development process.
Step 1
We will use the same two queries mentioned above to create the two report files using report builder. The files names will be given as Report1 and Report2.Report1 in builder will look like below.
And running the report the output will be like below
The report need to be deployed in the Report Server. We will discuss about the process in the later part of this blog.
Similarly Report2 in builder will look like below.
The output will look like below.
This also needs to be uploaded in the Report server.
Step 2
Open Report1.Go to insert tab and click on sub report. Drag the sub report box on the report body.

Step 3
Right click on the sub report box and click on sub report properties.
Step 4
The Sub-report Properties window comes up. Browse and selects the report name (Report1) that you want to use as sub-report from the report server.

Click ok.
Step 5
The final output will be like below.
Next we will see how we can add multiple sub report in one report.
Step 1
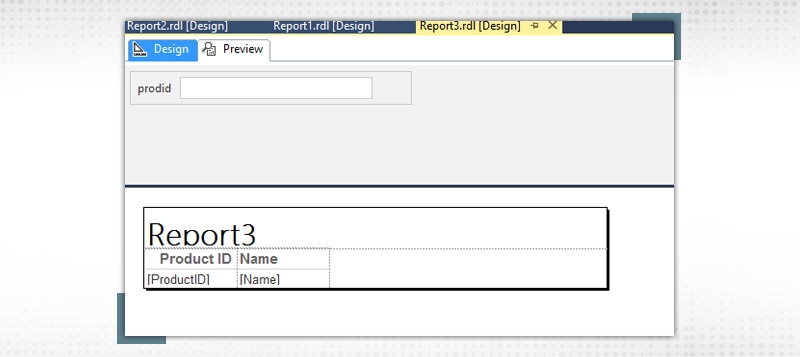
We will create another report3 in visual studio report designer. We will use the following query for the purpose.
select ProductID,Name from [Production].[Product] where ProductID in (@prodid)
The report in designer will look like below.
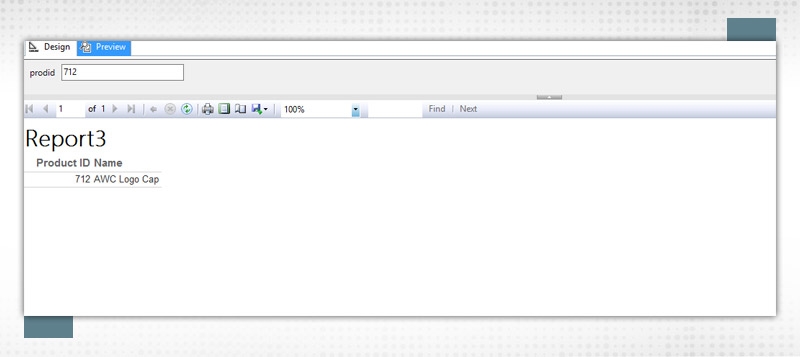
The output of the report looks like below.
Step 2
We will now merge the second report with the newly created report. We insert a sub report box in the second report like below.
Step 3
Right click on the sub report box and add report3.

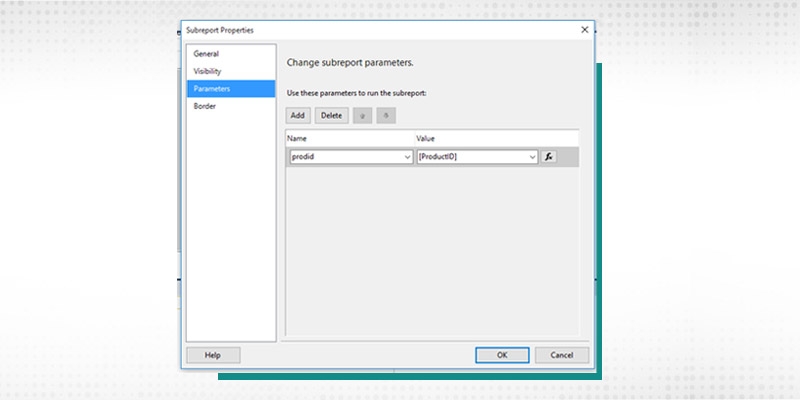
Also tag the product id parameter and the report column together.
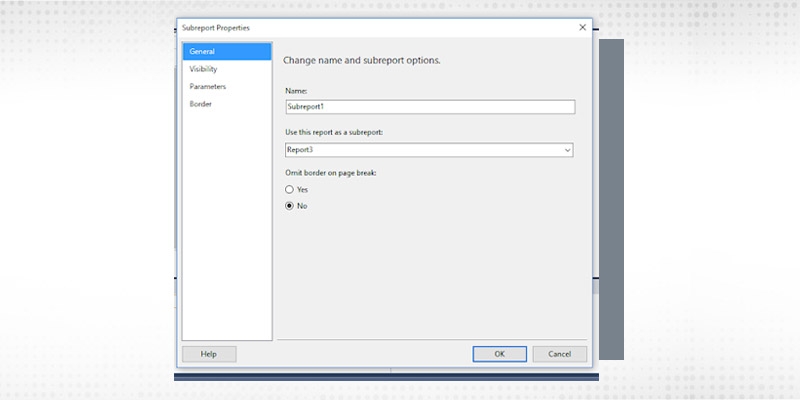
Click ok.
Step 3
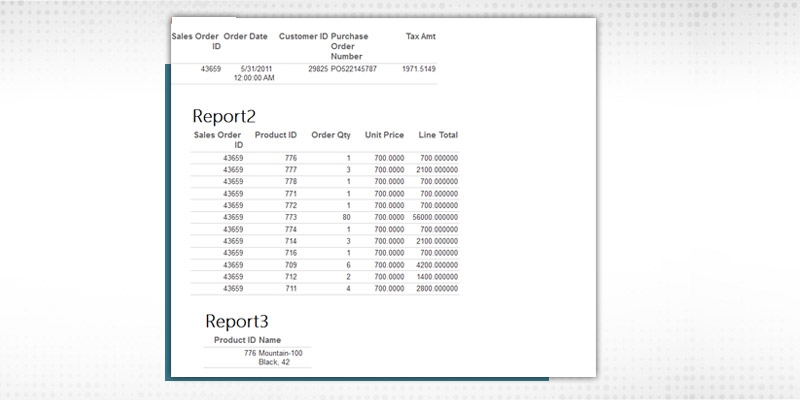
Finally, we run the report. The output of the report will look like below.
Here the first main report is connected to subreport1 through the parameter sales id. The second report is connected with Report 3 through the parameter Productid.
So when we pass Salesid as the parameter for the main report, the main report evokes the first sub-report and subsequently the first sub-report evokes the second sub report using the productid.
We can repeat the same process using Report builder. The only thing that we need to keep in mind is that we have to upload the three reports into the report server before invoking the sub-report feature.
Next we will learn how to deploy a SSRS report.
Step 1
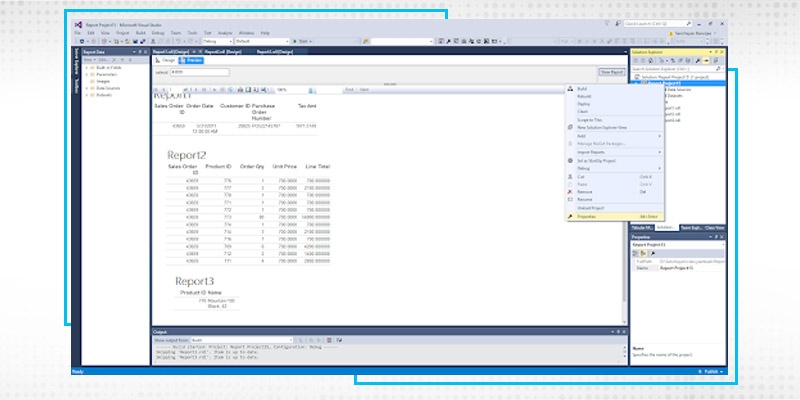
First we need to configure the reporting server properties. Right click on the SSRS project and click on properties.
Step 2
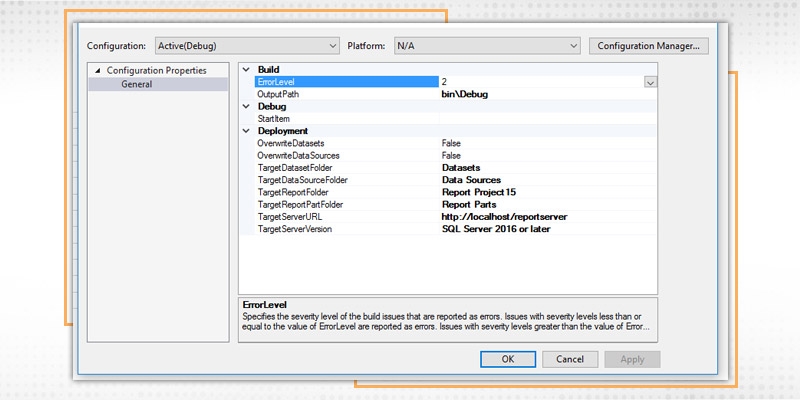
The report property page comes up.
Here we need to set the following properties.
TargetServerURL: This property is used to provide the Target URL where we want to deploy the SSRS project. For instance, If you’re going to deploy to a report server installed in share point, then provide the site URL.
Once the configuration is done click on Ok.
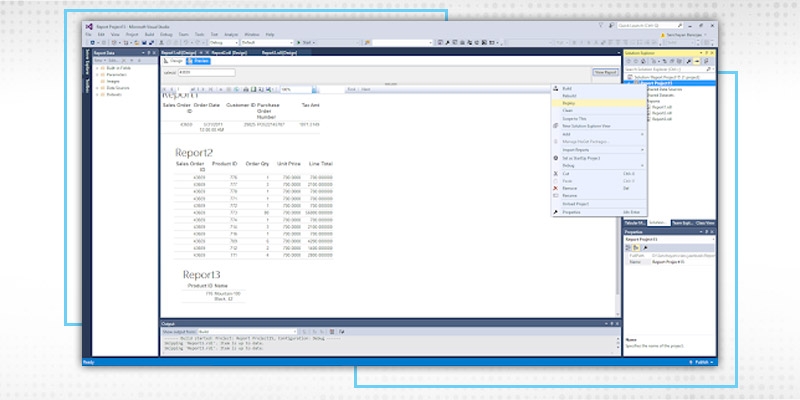
Step 3
Right click on the report project and click on deploy.
Step 4
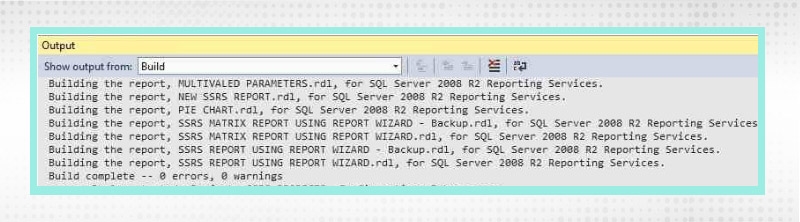
The output window comes up.
This allows you to check the details of the deployed report.
Step 5
Next we can open the report manager and check the deployed SSRS project.
The blog summarizes the process of the creation of sub reports in both report designer and report builder. It also shows the process of deployment of SSRS report. We have touched upon these subjects in brief. To know more about these topics further study or professional training on these subjects is required.
 FaceBook
 Twitter
 LinkedIn
 Pinterest
 Email
Email
I love to learn new things and also like sharing my knowledge with others. As an experienced IT Professional I like to update myself constantly with new and upcoming technologies. The database management system is one of my favorite subjects which I constantly explore.

Gen AI

Agentic AI

AI in Automation Testing

Cyber Security

Data Science

QA

Salesforce Service Cloud

AWS
Search Posts
Related Posts
Top 50 DB2 Interview Questions and Answers for Freshers & Experienced
 15.7k
15.7k
What is Foreign Key in SQL? How to Set, Add, Create & Use of Foreign Key
257.4k
Different Types of SQL Server & SQL Database Functions
413k
Step By Step SSAS Tutorial For Beginners
19.4k
How to Insert Multiple Rows Using Stored Procedure in SQL?
633.1k
Receive Latest Materials and Offers on SQL Server Course
Interviews


 Apr 19, 2024
 15.7k
15.7k
