

 Mar 05, 2019
  266.7k

02
JulMonth End Offer : Get 30% OFF + $999 Study Material FREE - SCHEDULE CALL
Month End Offer : Get 30% OFF + $999 Study Material FREE - SCHEDULE CALL
Launched in 2006, AWS empowers businesses across the globe to get hold of all the technologies and infrastructures. With AWS being scalable, reliable and high-performance, businesses no more have to rely on I.T teams and data centres. If you want to make a career in cloud computing, learning AWS is imminent. AWS Certification Course covers the fundamentals of AWS and its techniques, thus making you a perfect leader in the cloud computing industry.
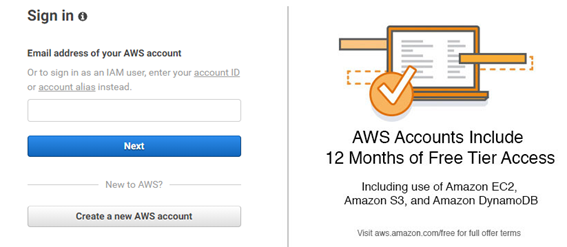
To get started with AWS, you should create an account first and the best part is that you can create an AWS account for free. AWS offers a 12 months free trial for new accounts and lets you enjoy most of the AWS services for free. You may learn different AWS components in 12 months like EC2, DynamoDB, S3 etc. However, there are certain limitations for free accounts and you have to use the paid version to manage these limitations. Moving ahead, let us first learn how to create an AWS account.
Get started with AWS with a clearer vision of cloud computing through our Cloud Computing Certification Courses. Enroll now!
AWS Solution Architect Training and Certification

1. To create an AWS account, you should browse the link https://aws.amazon.com/ first. Here click on complete SignUp button and choose “create a new AWS account” option on the next page.
Note: if you have previously signed in to AWS management console using AWS account user credentials, choose to sign in to a different account option. If you previously signed in to the console using IAM credentials then choose sign-in using root account credentials. After this, choose to create a new AWS account option.
2. As soon as you click on the “create a new AWS account” option, you have to enter your email ID, password, and the account name. You can use any email ID then set a strong password based on specified conditions, confirm the password again, enter your name in the account name field and click on the continue option in the end.

3. On the next page, you have to give the contact details and select the account type like Professional or Personal. Here, you have to give the proper detail as all fields ate mandatory. If you are working somewhere then choose the professional edition otherwise you may choose the personal edition. Once you enter all details successfully, tick the checkbox. You may read customer agreements if interested. Now click on Create account and continue option in the end.

If you're a beginner, this AWS Tutorial for Beginners will help you to take a step closer to your ideal job.
4. In the next step, you should add the payment information. Here you have to enter your debit or credit card details. Don’t worry, your details are safe with AWS and you will not be charged anything until you are associated with the free tier.
AWS charges a small amount to verify your account and the same account is refunded back within 3 to 5 business days, once your account is verified. After giving your card details, select” Secure Submit” option in the end. It will redirect you to the bank’s authorization page to complete the transaction.
5. After adding the card details, you have to verify your phone number in this step. Select the country code first then add your phone number, give a security code and click on the “call me now” option. Once your phone number is verified then you will get a success message for the account creation.

6. Now select the basic support plan for the AWS account. You can subscribe for any of the AWS support plans like Basic, Developer, Business, Enterprise etc. The basic plan costs nothing but resources are limited when compared to other paid editions. Once you choose the support plan, one confirmation page indicates that your account is being activated.
Accounts are generally activated within a few hours but in some cases, it may take up to 24 hours too. When your account is fully activated you will get an activation email. Now login to your account and enjoy full access to the AWS services after successful account activation.
Do you know that JanBask Training offers one of the best known AWS Certifications all over the country? Enroll now for free!
7. In the last step, you have to confirm the login details, Click on Login again option and it redirects to AWS management console where you will add login credentials to log in to your account and activate it successfully.
With these few simple steps, you have created and activated a new AWS account promptly. Select the desired role and areas of interest so that AWS can personalize the experience for you.

As we discussed already, accounts are activated quickly but account activation may be delayed sometimes. In the next section, we will discuss how to troubleshoot delays in account activation.
Get to know more from this blog on AWS Certification and Guide for a rewarding career ahead.
1. Finish the account activation process first
There are cases when you accidentally close the signup window before adding all necessary details. In this case, your account will not activate. To finish the signup process, sign in using the email id and password you set for your account and add the details again.
2. Check the payment details
At the payment method page, check the payment information closely. If there is some error in the payment method, your account may not be activated at the right time.
3. Check the financial institutions
Aws validates payment methods by adding small charges to your bank account. Financial institutions may reject this authorization request for multiple reasons.this case, contact the financial institution first to resolve the issue and ask them to approve the authorization request from AWS.
AWS is the biggest trendsetter in 2022. Here’s the list of the best AWS Certifications in 2022 for a lucrative career.
4. Check email for more details
In certain cases, AWS may ask for additional details to activate your account. This information is available on your email ID if AWS needs more information from you. So, don’t forget to check your inbox for extra emails.
5. Browser compatibility
Sometimes, you are not able to access your AWS account from a particular browser. In this case, try to log in from a different browser with the same user credentials.
6. Look for AWS support
If you don’t find any issue as discussed earlier, the last option is to contact AWS support and ask them to activate your account. You are recommended to contact the support team after 24 hours, once you have tried all possible options. Obviously, they can resolve the issue effectively but make sure that you are providing any sensitive details that are not required at that particular time like card details or more.
Redefine your career in AWS with these Top 10 AWS influencers.
Once you have created and activated your account without any issues, AWS assigns two unique identifiers for each AWS account.
AWS Account ID: It is a 12-digit number that is used to construct the Amazon Resources Name (ARN). It helps to differentiate your resources from other resources in the AWS account. When you navigate to the upper right corner of the navigation bar in the AWS management console, you can see the AWS account number there.
Conical User ID: It is a long alphanumeric key that is used by Amazon S3 bucket for the cross-account access. It is used to access resources from other AWS accounts.
Achieve a winning career in AWS by reading this blog on “How to become a Cloud engineer?”
AWS Solution Architect Training and Certification

MFA provides additional security by authenticating the user details from an authenticated device using a unique authentication code or SMS text message when a user accesses AWS websites or services. If MFA code is right then the user is authorized to access AWS services otherwise, he is not allowed to access AWS services.
To use MFA services, the user should assign a device first to the AWS root account. The device for each user should be unique and he cannot authenticate other devices to authenticate in that case.
Play this fun Quiz on AWS and see your subject knowledge.
With this discussion, I hope you now know how to create and activate an AWS account and the troubleshooting delays in account activation. This blog would help you to start using your own AWS account and related services immediately. You just have to follow the instructions step by step to get the things done. To know more on AWS concepts, you may join the AWS certification course at JanBask Training.
You can also join our AWS community for more information.
AWS Solution Architect Training and Certification

Q1. What is AWS?
Ans- AWS or Amazon Web Services is a subsidiary of Amazon that specializes in cloud computing platforms that offer scalable and cost-effective cloud computing services. It provides distributed computing processing capacity and software tools to individuals and companies.This architect is the most flexible and secured cloud computing platform today.
Q2. What features do AWS provide?
Ans- AWS provides an array of features. They are-
i) Flexibility
ii)Cost-effectiveness
iii) Scalability.
iv) Security
v) Elasticity.
Q3. What are some of the AWS Cloud products?
Ans- Some of the AWS Cloud products are as follows-
i) Compute
ii) Storage
iii) Database
iv) Analysis
v) Networking.
Q4. What is the necessity of AWS certifications?
Ans- AWS certifications are important to have as they:
Q5. What skills will I be learning in this course?
Ans- Here are all that you will learn:
Q6. What do AWS Developers do?
Ans- AWS Developers develop, migrate, and test AWS Cloud environments and integrate with other providers.They design and deploy solutions within AWS, while ensuring success during designing, building, and migrating applications, software, and services over the AWS platform and have robust use of services like EC2, EBS, Lambda, IAM, API Gateway, S3, DynamoDB, Elasticache, Step Functions, Kinesis, CFT, CloudFront, Load Balancers, AutoScaling, CloudWatch, CloudTrail, Elastic Search, VPC, etc.
Q7. What are the required skills for AWS?
Ans- Technical Skills for AWS Solution Architect jobs
Personality skills for AWS Solution Architect jobs
Q8. What can I expect after this course?
Ans- After completing our AWS certifications training online, you will achieve:
Q9. What is the average salary of an AWS Solution Architect?
Ans- The average salary of an AWS professional, according to Indeed, approximately ranges between $93, 157 to $139,415 per year.
Q10. What is the future scope of AWS professionals?
Ans- AWS has customers all across from over 190 countries - which covers millions of customers in 5000 education institutions, 127,500 nonprofit organizations, 2000 government agencies. AWS Data Services increased by a whopping 96% in just a single year - including Amazon ElastiCashe, Amazon RDS, Amazon Redshift, Amazon DynamoDB. AWS has over 70 services inclusive of storage, computing, database, networking, application services, analytics, management, deployment & mobile. AWS has over 1 million customers associated with it, which means job opportunities in this field are extravagant.
Deepa, creativity fanatic, who does ample market research to create engaging and insightful content to lead our digital learners towards success in the IT & every other thriving industry.

Gen AI

Agentic AI

AI in Automation Testing

Cyber Security

Data Science

QA

Salesforce Service Cloud

AWS
Interviews


 Apr 26, 2023
 7.5k
7.5k