
 Jan 17, 2020
  10k
10k

18
JunMonth End Offerl : Get 30% OFF + $999 Study Material FREE - SCHEDULE CALL
- DevOps Blogs -
DevOps enthusiasts are generally looking to explore different tools that are frequently used in the workplace. If you are one of them then you have landed on the right page. DevOps professionals are generally paid higher and high in-demand worldwide. Keeping all these things in mind, let me introduce you to one of the most popular DevOps tools, Jenkins.
Jenkins is an automation tool written in Java programming language and suitable Continuous Integration tasks. It is used for continuous building of projects and you can quickly integrate the changes when needed. Also, Jenkins helps in the rapid deployment of a project by utilizing a wide number of deployment technologies. The acceleration in the development phase is achieved by automating tasks. Like a team lead, Jenkins will continuously check and evaluate the code for identifying unexpected errors early in the development phase.
CI is a software development practice that helps developers to commit changes frequently to the source code in a shared repository. Every commit is pulled continuously and built. Jenkins is a CI tool that continuously builds, pulls, and tests the source code using plugins. in this blog, we will discuss the Jenkins cheat sheet for beginners that is necessary to learn before you start with the software development process using DevOps.
In the year 2006, Kohsuke started a project with the name Hudson. Later on, the name of this project was changed to Jenkins, instead of Hudson. If you are searching for Jenkins and find some information about the Hudson then you don’t have to get surprised because both are the same things. Hudson’s project is still into existence but in the corporate world. At the same time, Jenkins is on fire these days and getting huge acceptance by DevOps users worldwide.
In this section, we will discuss the installation of Jenkins on Ubuntu. Here are the steps, you need to follow while installing Jenkins on Ubuntu.
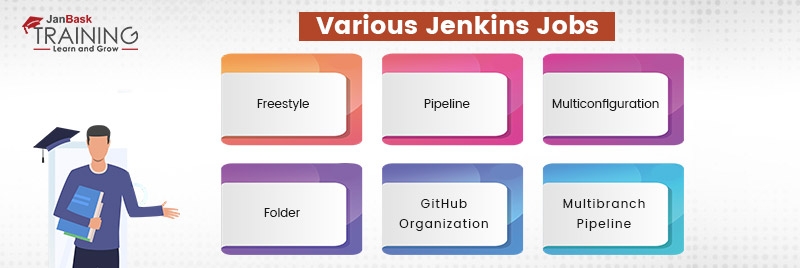
$ sudo apt update $ sudo apt install openjdk-8-jdk$ wget -q -o -https://pkg.jenkins.io/debian/jenkins.io.key | sudo apt-key add -$sudo sh -c 'echo deb http://pkg.jenkins.io/debian-stable_binary/>/etc/apt/sources.list.d/jenkins.list'$ sudo apt update $ sudo apt install Jenkins$systemctl status Jenkinshttp://localhost:8080When using Jenkins, you can work on the following jobs during the software development process.
Read: What is Git? Git Tutorial Guide for Beginners
Using the Jenkins Pipeline, you can run the entire workflow as a single code, instead of running multiple jobs for different stages of software development. The code is stored in the Jenkins file and it is written using the Groovy DLS programming language. It is based on the following two syntaxes.
First is the Scripted Pipeline and the other is Declarative Pipeline. In the Scripted Pipeline, the code is written using the Jenkins UI instance and enclosed within the node block. Its syntax can be given below.
node {
scripted pipeline code
}
For the declarative pipeline, the code is enclosed within the pipeline block and it is written locally within a file.
Pipeline {
declarative  pipeline code
}
Once you are sure of what is Pipeline and its different types, let us see how to create a pipeline in Jenkins. Using the following steps, you can create both types of pipelines in Jenkins, either it is scripted pipeline or declarative pipeline.
Jenkins installation comes with 2K+ plugins and each has unique functionality. When it comes to the software development process then most commonly plug-ins that are preferred by developers are given below.
Read: Azure DevOps Engineer Salary: Everything You Need to Know
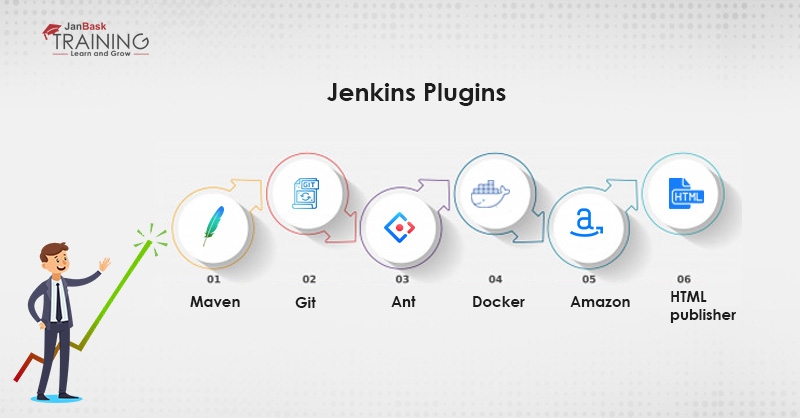
You should follow the below steps for installing the above plugins or this step can be used to install almost any Jenkins plugin. Go to the Jenkins Dashboard, choose the option “Manage Plugins” and browse the list of available plugins. Here, you can search your favorite plugin and install it on your Jenkins framework right away to make the development process easier.
The pipeline concept in Jenkins is used for chaining various jobs together and you can run them together into a sequence. Let us understand how to build a pipeline in Jenkins with an example.
Go to the Jenkins Dashboard, choose the option “Manage Plugins” and browse the list of available plugins. Here, you can search your favorite plugin and install it on your Jenkins framework right away to make the development process easier.
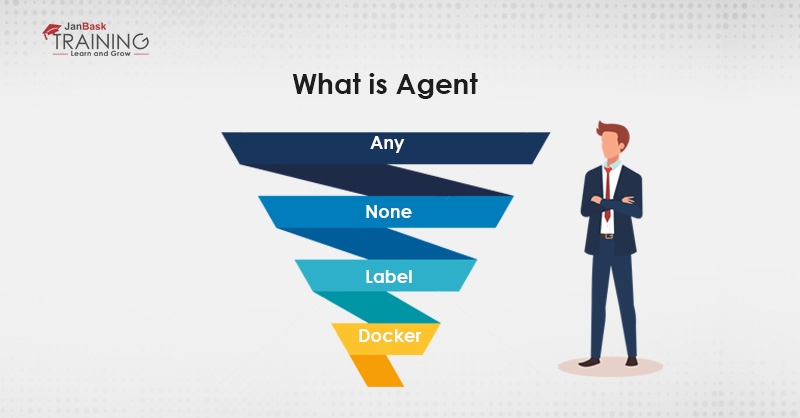
When you are working on Jenkins Pipeline, you must be aware of basic terminologies to use each of the options in the best way. In this section, we will discuss a few common Jenkins terminologies that are common for both, either scripted or declarative pipeline.
node {
state ('SCM checkout') {
//checkout from your SCM (Source control Management)
//for ex: Git Checkout
}
State('Build') {
//compile code
//install dependencies
//perform Unit Test, Integration Test
}
state ('Test') {
//resolve test server dependecies
//perform UAT
}
Stage ('deplou') {
//deploy code to prod server
//solve dependency issues
}
You must be eager to know how to start, restart, or stop the Jenkins? Here are the commands to follow for your reference. These commands are easy to run and learn.
Read: What are the difference between Git Push and Git Push Origin?
$sudo service Jenkins restart
$sudo service Jenkins stop
$sudo service Jenkins start
In the next step, let us see how to design a custom build in Jenkins using the core plugin? When you are using the plugin, most of the work is done by the plugin and you just have to set or configure features. Here are the basic steps to follow for building a customized pipeline. You can play with command and work as per the requirement. The only condition is that you should know how to work on the tool and a basic idea of Linux/Unix commands too. It will help you to learn the tool quickly.
$Jenkins_Home/plugins.<plugin>.hpi.pinnedSnippet Generator is a tool used to create code in a scripted pipeline. Let us understand the concept with the help of an example.
Now, you have the basic idea of the tool and you are ready to enter the DevOps space with depth knowledge of Jenkins features and commands. Also, you can build pipeline and club multiple jobs together to save resources and to increase the deployment time.
Jenkins Cheat Sheet for beginners is a must go through the blog for people who want to learn Jenkins or want to get into DevOps space. It is not easy learning all features and commands theoretically but you have to practice them thoroughly.
JanBask Training offers instructor-led LIVE practical training where you will be assisted on how to install Jenkins on your system and start working over it. Most importantly, you will get a chance to work on a minimum of two Jenkins projects and enhance your skills to implement in the workplace.
So, join the Jenkins training program right away and start learning the amazing DevOps tools with the JanBask Training team right away.
Read: What is DevOps Model and What it can do?
 FaceBook
 Twitter
 LinkedIn
 Pinterest
 Email
Email
The JanBask Training Team includes certified professionals and expert writers dedicated to helping learners navigate their career journeys in QA, Cybersecurity, Salesforce, and more. Each article is carefully researched and reviewed to ensure quality and relevance.


Cyber Security

QA

Salesforce

Business Analyst

MS SQL Server

Data Science

DevOps

Hadoop

Python

Artificial Intelligence

Machine Learning

Tableau
Search Posts
Related Posts
20 Dynamic DevOps Tools for Effortless Infrastructure Automation and Monitoring
 3.9k
3.9k
Jenkins Certification A complete Guide
5.2k
What is The Difference Between Devops, Sysops & Webops
416.2k
How to Learn DevOps and Become a DevOps Engineer | Complete Guide
432.5k
Boost Your Career With 150 DevOps Interview Questions and Answers
159.5k
Receive Latest Materials and Offers on DevOps Course
Interviews


 Jul 28, 2023
 3.9k
3.9k
