
 Jun 05, 2020
  6.4k
6.4k

07
AugMonth End Offerl : Get 30% OFF + $999 Study Material FREE - SCHEDULE CALL
- SQL Server Blogs -
We all know that Power BI is a popular BI reporting tool. It has very strong capabilities of generating powerful full BI reports from any data source, be it a standard relational database management system like SQL Server or Oracle or flat files like text or CSV file. In one of our earlier blogs, we have learned about different components of a Power BI desktop application. In this blog, we will learn how to use Power BI to develop a simple Power BI report.
The most important component of a Power BI tool is the Query Editor. Next, we will learn about Power BI Query Editor.
With Power Query Editor, we can explore, characterize, and perform data change activities over an information source. To show the Query Editor Dialog box, we need to connect with an information source, and click Edit Query in the Navigator pane or double click a query in the Workbook Queries pane. Next, we will see a step by step run through on how to use data editor. We will be using the Adventureworks2016 database for all the examples in this blog.
Step 1
Open Power BI Desktop application.

Step 2
Click on Get Data and select SQL Server.

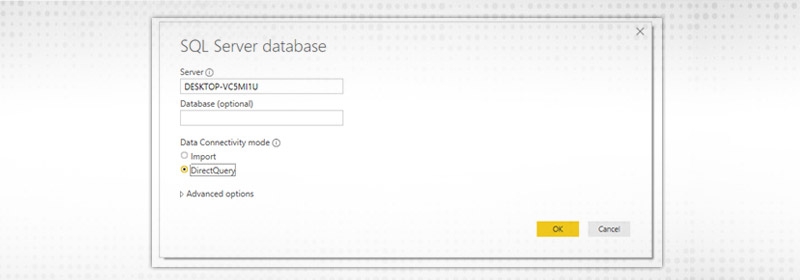
Step 3
The following screen appears. Provide the Server name and select direct query and click on Ok.
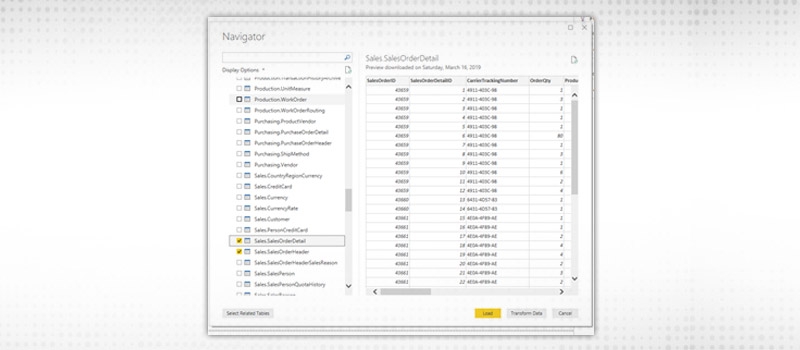
Step 4
In the Navigator, screen selects the necessary tables and database from the database list and click on Load.
Step 5
Click on edit queries.

Step 6
The following screen appears.

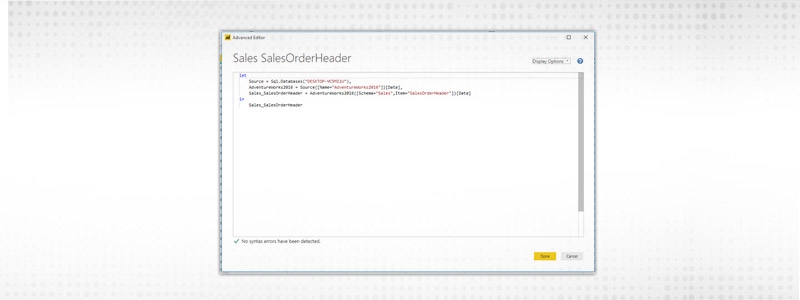
Step 7
Click on the advance editor.

The query editor window will open like below.
There is another way how we can call the query editor. For the next few lines, we are going to discuss that.
Step 1
Open the Power BI desktop application.

Step 2
Click on edit queries to open the query editor window.

Step 3
The query editor window appears.

Step 4
Click on the new source and select SQL Server.

Click on connect.
Step 5
We put the server name, the database name and also write the query that would be used for generating the Power BI report.
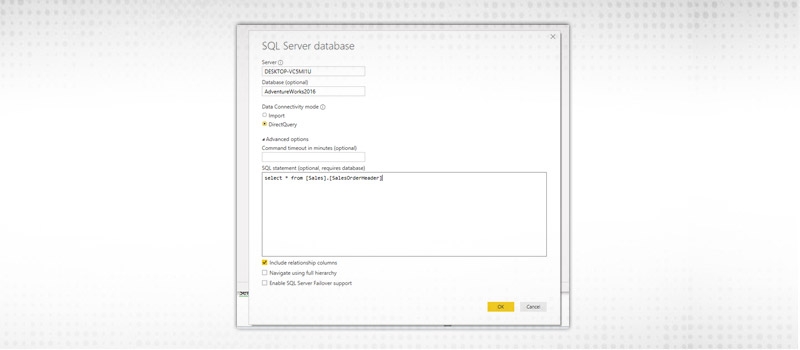
Once done we will click on Ok.
Step 6
When you click on Ok, the application will give the output of the query in a pop up window.
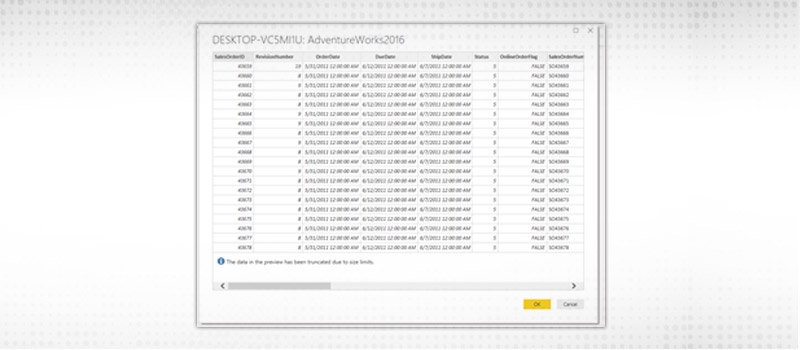
Then we click on OK.
Step 7
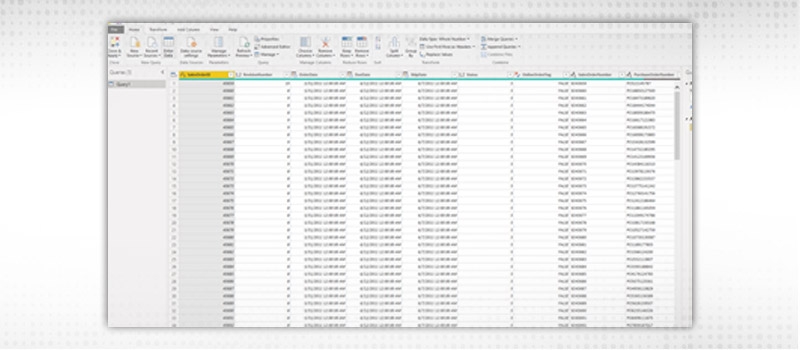
You will see the query is added to the report.
Step 8
When you exit the power query editor it asks whether you want to apply the changes. Click Yes.

Step 9
The changes will be applied into the report as below.

Once the query is created in Query editor we might need to rename the query. Next, we will discuss how to do it.
Step 1
Open a Power BI report and click on Edit Queries.

Step 2
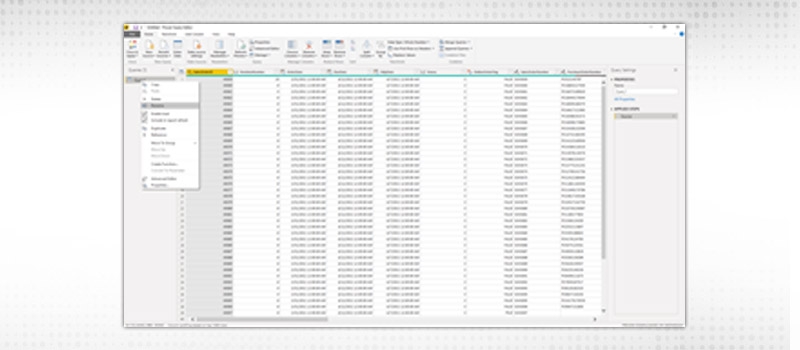
The query editor window pops up. Right-click on the query you want to rename and select rename.
Step 3
Provide the new name of the query and click Close and Apply.
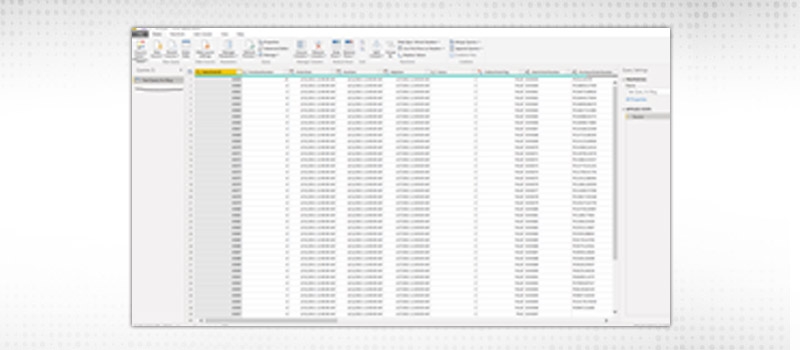
The query will be renamed and the changes will be applied to the report.
We create two excel files from the output of the following two queries from the Adventureworks database.
select * from [Sales].[SalesOrderHeader]

 select * from [Sales].[SalesOrderDetail]
Now let us combine the two files using Power BI query editor.
Step 1
Open the Power BI desktop application.

Step 2
Double click on the GetData option and select the folder option.

Click the Connect button.
Step 3
The system will ask to select the folder in which the files are located.
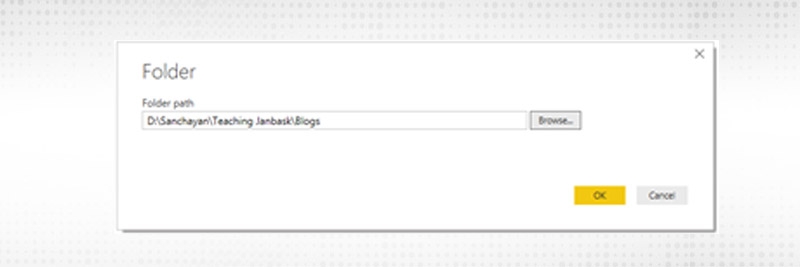
Select the folder and click on the Ok button.
Step 4
A popup window appears showing details of all the files located inside the folder. Select the related file and click on the Combine button.

Step 5
Click on apply changes to apply the change in the report.

Step 6
The final output looks like below.

Once you have generated we can set relationships between the tables. Power BI query editor allows us to set the relationship between tables. Next, we will learn how to do it.
Step 1
Click on Manage Relationships on the main Power BI window.

Step 2
The following window pops up.

Click on the New button.
Step 3
The following screen pops up.

Click the Ok button to create the relationship.
SQL Server Training & Certification

Next, we will learn how to filter rows of a query table from within Power BI query editor.
Step 1
Click on Edit Queries to go into Power BI query editor.

Step 2
The Power BI Query Editor appears.

It shows all the details of the queries used in the report.
Step 3
There are two buttons in the Power BI Query Editor window –Keep Rows and Remove Rows.

Keep Top Rows: This shows a specified number of rows from the top of the dataset.
Step 1
Click on the Keep Top Rows button.

Step 2
A window pops up asking for the number of rows to be displayed from the top.

Step 3
The final output is as follows.

Keep Bottom Rows: This shows a specified number of rows from the bottom of the dataset.
Step 1
Click on the Keep Bottom Rows button.

Step 2
A window pops up asking for the number of rows to be displayed from the bottom.

Step 3
The final output is as follows.

Keep Range of Rows: Displays a range of rows provided by the user.
Step 1
Click on Keep Range of Rows button.

Step 2
A window pops up asking the user to provide the range of rows to be displayed.

Click Ok.
Step 3
The final output displays the range of rows provided as a parameter.

Remove Top Rows: This removes a specific number of rows from the top.
Step 1
Click on Keep Remove Top Rows button.

Step 2
A window pops up asking for the number of rows to be removed from the top.

Step 3
The final output is like below

Remove Top Rows: This removes a specific number of rows from the bottom.
Step 1
Click on Keep Remove Bottom Rows button.

Step 2
A window pops up asking for the number of rows to be removed from the bottom.

Step 3
The final output looks like below.

Remove Alternate Rows: It removes every alternate row from the first and last mentioned rows of the dataset.
Step 1
Click on Remove Alternate Rows button.

Step 2
The remove alternate rows window pops up. It asks you to enter the row from where the elimination will begin, a number of rows to delete and the number of rows to keep.

Step 3
The final output looks like below.

Step 1
Select the column you want to remove and click on the Remove column button in Power BI Query Editor and select Remove Columns option.

The column will be removed from the dataset.
SQL Server Training & Certification

Step 1
Click on Choose Columns and select Choose Columns option.

Step 2
The choose columns popup window comes up.

Select the number of columns you want to display in the dataset and click Ok button.
SQL Server Training & Certification

Lookup is mainly used in DAX queries. DAX queries are a special kind of query format that is used in Power BI. This is beyond the scope of this blog. But we can certainly share the syntax of the LOOKUPVALUE command below for readers to explore further.
LOOKUPVALUE(
Step 1
Go to the Power BI query editor and click on the Merge Queries button.

Step 2
The following screen appears
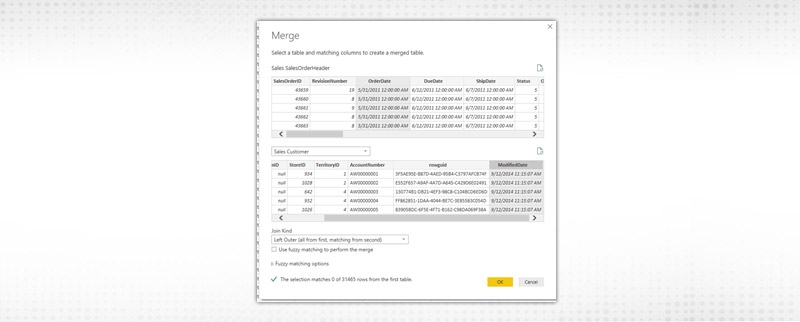
It requests you about the table you want to merge together and what will be the join type. For the following example, we will be merging the SalesOrderHeader table with Customer and the join kind will be Left Outer. Once you are done click on Ok. We also need to select the same number of columns from both the tables having the same data types.
Step 3
The final output looks like below.

Step 1
Open Power BI Query Editor. Click on Enter Data button.

Step 2
The following window pops up.

By default, it comes with one Colum. But you can add multiple by right-clicking on the column and click on Insert option.

Step 3
Click on Ok and the new tables will be added in the list.

You can rename the table name to your choice.
As data becomes more accessible, manipulating vast amounts of available data to drive insights and make business decisions can be a challenge. Business leaders at every level need to become data literate and be able to understand data and analytical concepts that may have previously seemed out of reach, including statistical methods, machine learning, and data manipulation. With this spread of data literacy comes the powerful ability to make educated business decisions that rely on the smart use of data, rather than on an individual’s opinions. In the past, these tasks were extremely complex and would be handed off to engineers. With the tools that exist today, business leaders are able to dive into their own analytics and uncover powerful insights.
Learn SQL Server in the Easiest Way

In this blog, we tried to touch upon different tools that are used to create different BI Tools. These are only a short discussion of all the tools. For a detailed study of this tool, proper training using a specialized course on Power BI application is required.
 FaceBook
 Twitter
 LinkedIn
 Pinterest
 Email
Email
I love to learn new things and also like sharing my knowledge with others. As an experienced IT Professional I like to update myself constantly with new and upcoming technologies. The database management system is one of my favorite subjects which I constantly explore.

Gen AI

Agentic AI

AI in Automation Testing

Cyber Security

Data Science

QA

Salesforce Service Cloud

AWS
Search Posts
Related Posts
Learn SQL Union All Query Operators with Examples
 683.3k
What is the Difference Between Control Flow & Data Flow in SSIS?
47k
Normalization in SQL | 1NF, 2NF, 3NF and BCNF with Examples
491.2k
Most Popular SQL Server Performance Tuning Tips
783.5k
What is Composite Key in SQL? Composite Primary & Foreign Key Explain with Example
524.2k
Receive Latest Materials and Offers on SQL Server Course
Interviews


 Jun 27, 2018
 683.3k